
Battle of Dogger Bank
After their success at Scarborough back in December, German Admiral Franz von Hipper decided to set off on another British attack. Only this time he wasn’t nearly as successful.
On January 24th, he was intercepted by British Vice-Admiral Sir David Beatty, who was stationed near Dogger Bank. He did this using “a German code book originally captured by the Russians,” allowing him to decode German radio traffic (Source). With this information in hand, he and his fleet set sail early January 24th with five battle cruisers and six light cruisers. At Harwich, Beatty was joined by more cruisers. It was safe to say that he was prepared to meet with the German Navy once again.
Thus, by the time Hipper’s force was setting out, well, so where the British formations. For their part, the British headed towards the intended rendezvous, Dogger Bank.
Not wanting the Germans to intercept their plans as they’d done with the Germans’ plans, all British ships were warned to maintain radio silence. They needed to surprise the Germans.
At about 7:15 that morning, HMS Southampton signaled that gun flashes had been sighted. The HMS Lion confirmed the sighting. It took only minutes for the HMS Aurora to engage the Germans.
The Germans, for their own part, were busy trying to avoid British confrontation. They hoped to do this by trying their boats around and attempting to outrun the British.
Clearly they’d been wrong.
It only took an hour for the British to catch up with them. HMS Aurora was the first to see the German ships. However, mistaking the ship for another British ship, the HMS Arethusa, she did not fire first. The German light cruiser, SMS Kolberg fired on HMS Aurora, prompting return fire before turning away. Despite more Germans ships showing up in the horizon, the undaunted HMS Aurora followed.
Initially, the German ships began to turn away, seemingly retreating hastily.
Around 8:15 the HMS Meteor was able to close ranks with the German ranks and began firing. After a mere few rounds, however, the Germans again began to retreat. Beatty’s ships continued their pursuit, despite being fired on by the SMS Blucher.
Then, at 9 am, the HMS Lion “opened fire on the Germans from a distance of more than 20,000 yards” (Source). Their first two shots weren’t even accurate. The first fell too short and the second went over. But then, Beatty signaled the British cruisers to engage. The HMS Lion was joined by the HMS Tiger and the HMS Royal.
By 9:15, the HMS Lion had managed to seriously damage the SMS Blucher. After two more hits, two of SMS Blucher’s turrets were destroyed, resulting in 200-300 casualties. “The German cruisers returned fire on the British battle cruisers as they caught up with them. [HMS] Lion shifted her fire to the [SMS] Moltke, while [HMS] Tiger and [HMS] Princess Royal continued to fire on [SMS] Blucher” (Source).
At this point in the battle, the HMS Lion was the only ship in full range of all the Germans ships and was receiving heavy damage. She needed to be relieved. This didn’t stop her, though. At Beatty’s signal, she switched to firing on the SMS Seydlitz, causing significant destruction. Two of SMS Seydlitz’s turrets were put out of action, and the ammunition handling systems of both exploded, causing massive fires to the ship. The crews of both turrets were killed.
Throughout all this, the German ships SMS Seydlitz, SMS Derfflinger, and SMS Moltke were all firing on the HMS Lion.
“In the pursuit, both the British and German forces were sailing flat out, causing thick black smoke to pour from the funnels of some forty ships. The result was that the battle area became obscured, making accurate gunnery at the long range extremely difficult” (Source). On top of this, at least three German ships were on fire, adding to the smoke and haze.
The German destroyers were hanging back to assist the burning ships, but Beatty read this as their planning a counterattack and chose to pull back.
Around 9:40, the HMS Lion’s roof was smashed. The A turret was disabled. At about the same time, a shell to HMS Lion’s armor belt caused the ship to start listing towards port.
With a sudden onslaught from the British, the SMS Blucher began an attack. However, Commodore Goodenough ordered his light cruisers to move out of the way of the German battle cruisers. The German destroyers were smoking so heavily at this point, that they were pretty well covered.
Meanwhile, HMS Lion was still being fired upon. At a little after 10, she was hit just below the water line by the SMS Derfflinger, causing flooding aboard ship. But that wasn’t the worst of it for the HMS Lion. “The German guns had Lion’s range so precisely, firing accurately and rapidly, that shells were falling all around the ship and she was forced to zig-zag” (Source).
But as the smoke was beginning to clear around the German destroyers, Beatty was finally able to make them out, and ordered an attack. By this point all of the German ships were beginning to show considerable amounts of damage – all except SMS Derfflinger.
Yet the only British ship being really fired upon was still the Lion. Before 11 o’clock, she was rapidly flooding. The A turret briefly caught on fire, as well, but was easily put out (likely thanks to the flooding).
Things were beginning to look and look worse for SMS Blucher, as well. Around the same time, it was becoming increasingly clear that everything was out of control on board. Hipper ordered yet another attack, hoping that it might save SMS Blucher from further attack.
As out of control as things were aboard SMS Blucher, it was rapidly getting worse for HMS Lion. By 11, some much damage had been done that the port engine had to be stopped. Smoke billowed out all around her and she was unable to keep in contact with the rest of the British fleet. With Lion was as good as out of commission, Admiral Moore was forced to take control of the British fleet.
Yet Beatty gave two more finally signals, which were unfortunately misread with all of the smoke and chaos. He’d meant for the other ships to attack at the enemy’s rear and to stay in close. Yet it was mistakenly read as ‘Attack the enemy’s rear, bearing north-east’ – meaning that the rest of the British ships took aim on the already suffering SMS Blucher.
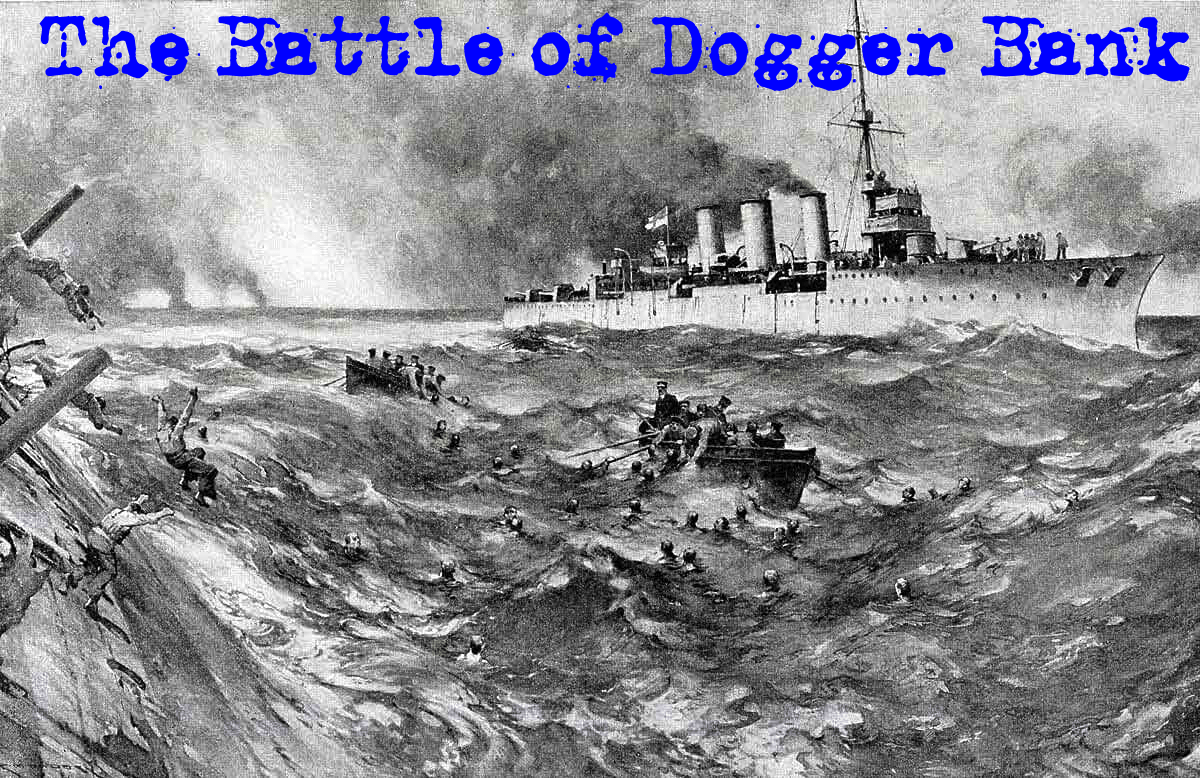
[Below: HMS Arethusa saves men from the sinking SMS Blucher.]
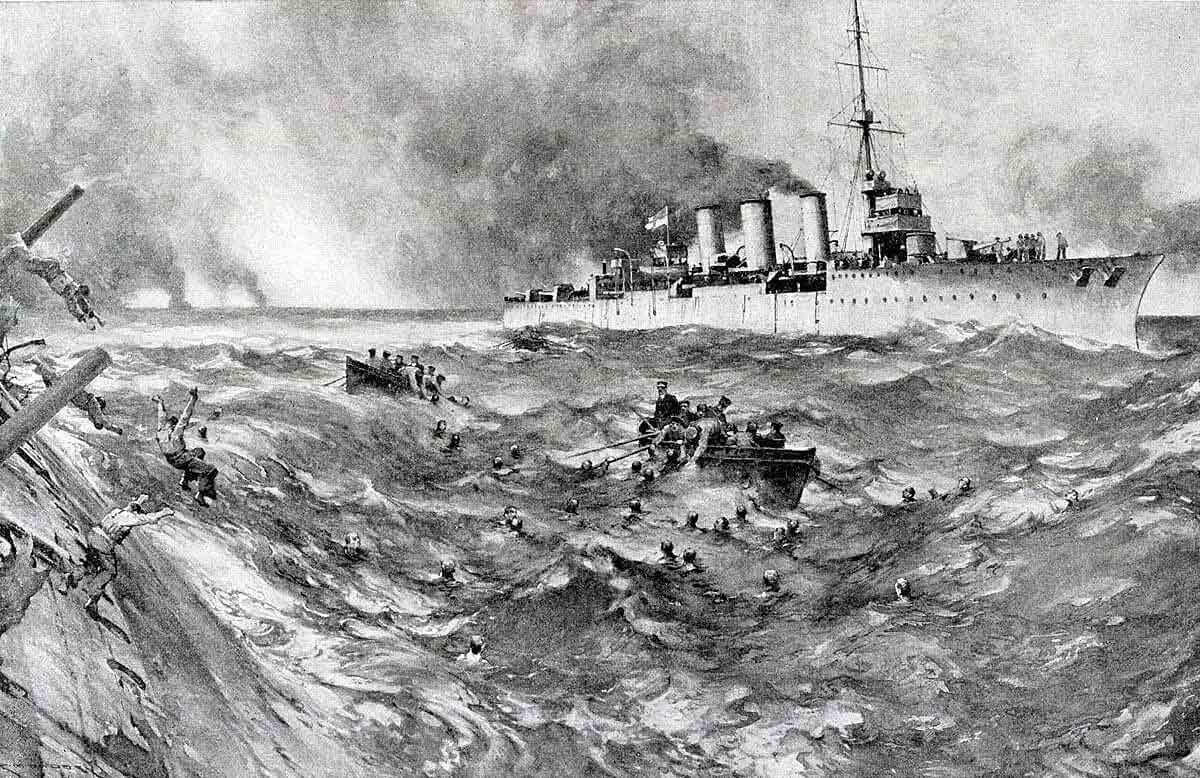
The rest of the German fleet fled, leaving Blucher to her fate alone. With only two turrets left in working order, SMS Blucher was left to face what was left of the British. Not willing to give up so easily, Blucher was able to fire back, hitting both HMS Meteor and HMS Arethusa.
At 11:45, SMS Blucher raised her colors. At 12:20 she capsized.
Close by, HMS Arethusa lowered boats, rescuing some 260 men.
However, a German sea plane chose this unfortunate moment to fly over and bombed the Arethusa. The British were able to drive off the plane, but then Arethusa left the remaining SMS Blucher survivors in the sea. In all, some 782 men aboard had been killed.
During all of this, Beatty managed to move from HMS Lion to the HMS Attack, where he retook command. He ordered the British fleet to pursue the Germans, but once it began clear that the Germans were once again out of range, he ordered his fleet back to the rescue of the Lion.
Around 3:30, as HMS Lion’s speed continued to decrease, Beatty ordered HMS Indomitable to tow her. The British once again chose to pursue the Germans, but firm orders were put into place that the Lion and Indomitable were to be provided cover for their protection. But by 4:30, they were left on their own as the rest of the ships returned for Scapa Flow.
Shortly thereafter, HMS Lion’s engines broke down. They two slowed down to 7 knots. On the 25th, they were able to pump some of the excess water out of Lion’s compartment, allowing them to pick up speed once again. By dawn, they were finally able to dock. The also damaged SMS Meteor was also towed back to dock.
The Lion was saved, but 15 men were lost during the fight. It wasn’t, really, one of the biggest or most important battles of the first world war, but it did give the British a needed moral booster. Afterward, Admiral Moore was transferred to the Canary Islands.
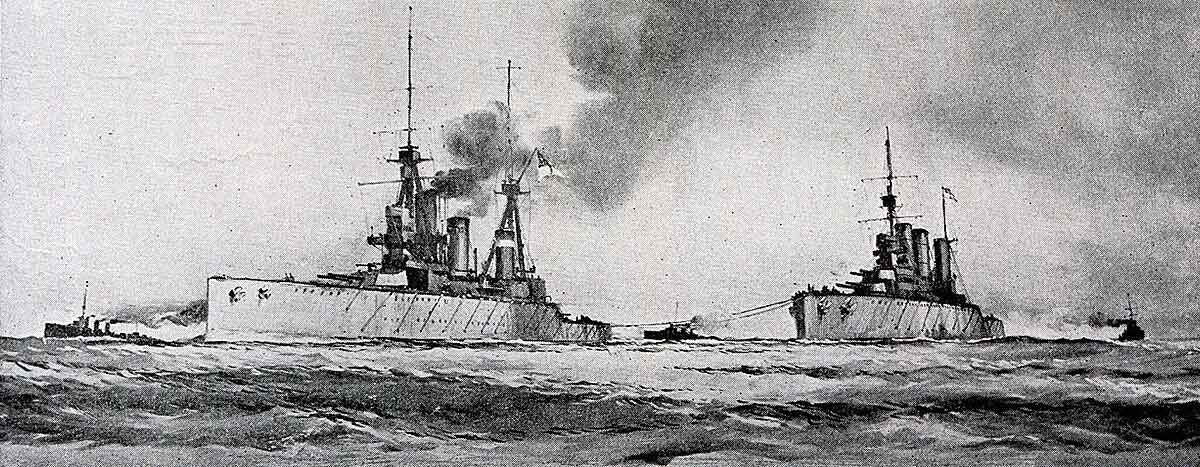
[Below: HMS Indomitable towing the HMS Lion.]